1 min read
How to Hire, Manage, and Pay Hourly Shift Gig Workers with Get Workers
So you’ve successfully created your first Shift Gig, congrats! Now it’s time to learn how to hire, manage, and pay your workers.
3 min read
As a business requester who frequently uses Get Workers to find, hire, manage, and pay local Shift Gig workers, we want to make sure you have an easy way to re-hire the workers you love.
Now, you can use Worker Groups to build a pool of your favorite workers as well as build other groups to make rehiring easier than ever before. Want to access a pool of workers with certain tools or equipment? Create a Worker Group. Want to access a pool of workers who have certain scheduling availability? Create a Worker Group. The possibilities are endless.
Read on to learn more about Worker Groups and how you can use them to supercharge your Get Workers hiring practices.
STEP ONE: Create Your Own Worker Groups
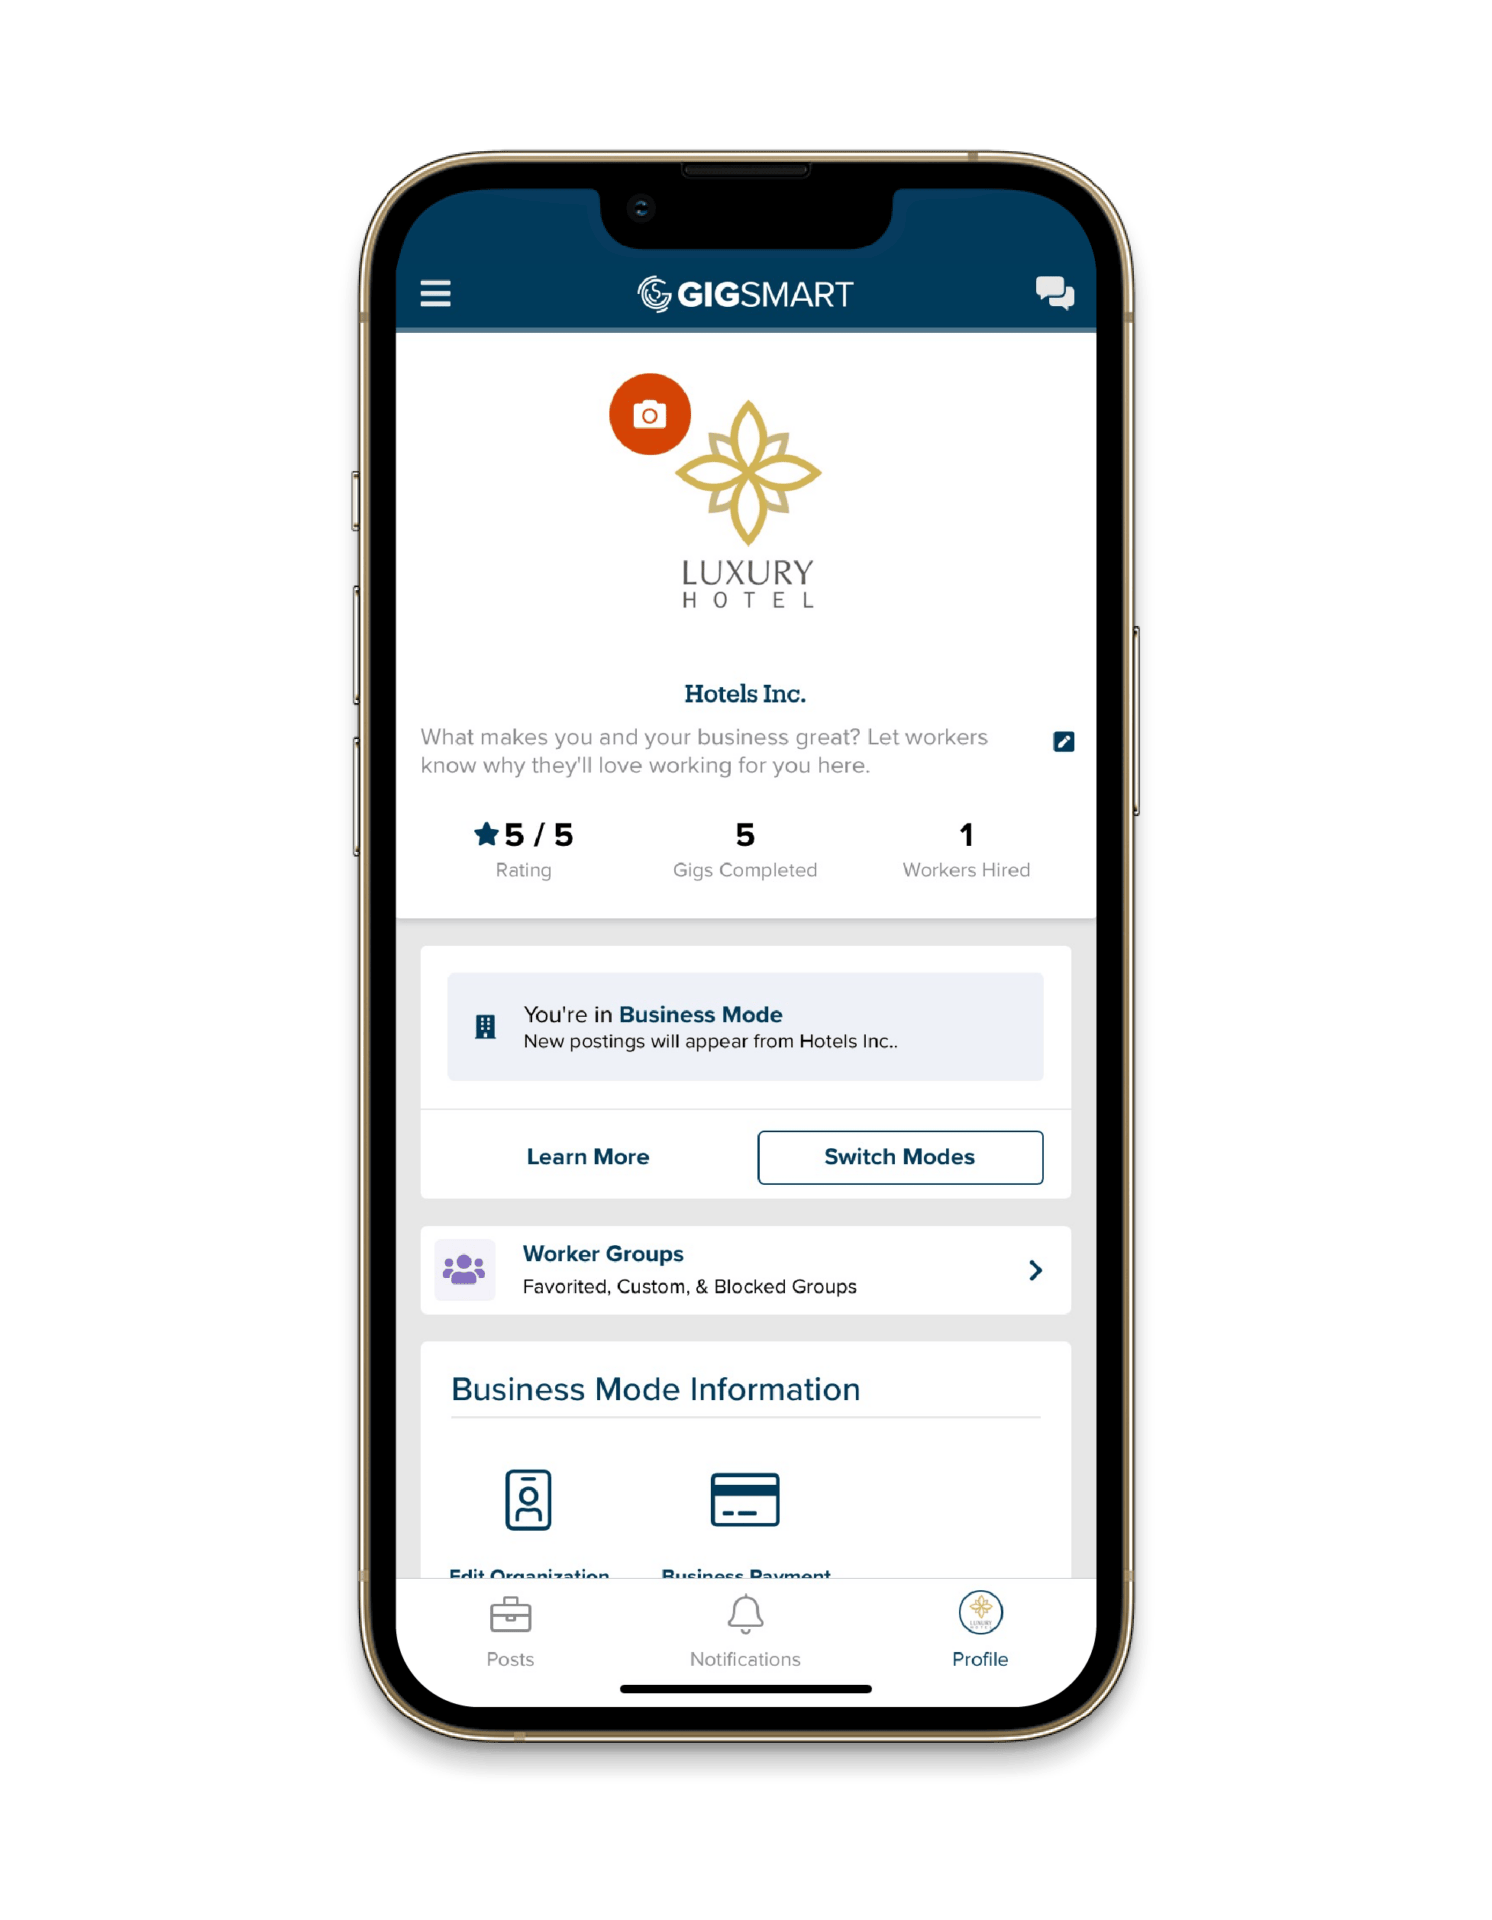
To start, you’ll want to make sure your account is in Business Mode. You can confirm this from your Profile, which is where you’ll want to be to set up your Worker Groups as well.
From your Profile, you’ll see a new Worker Groups section. Click the arrow to manage your Worker Groups.
From here you can see your Favorited Workers, Custom Worker Groups, and Blocked Workers. You can click manage next to each section to add or remove workers as needed.
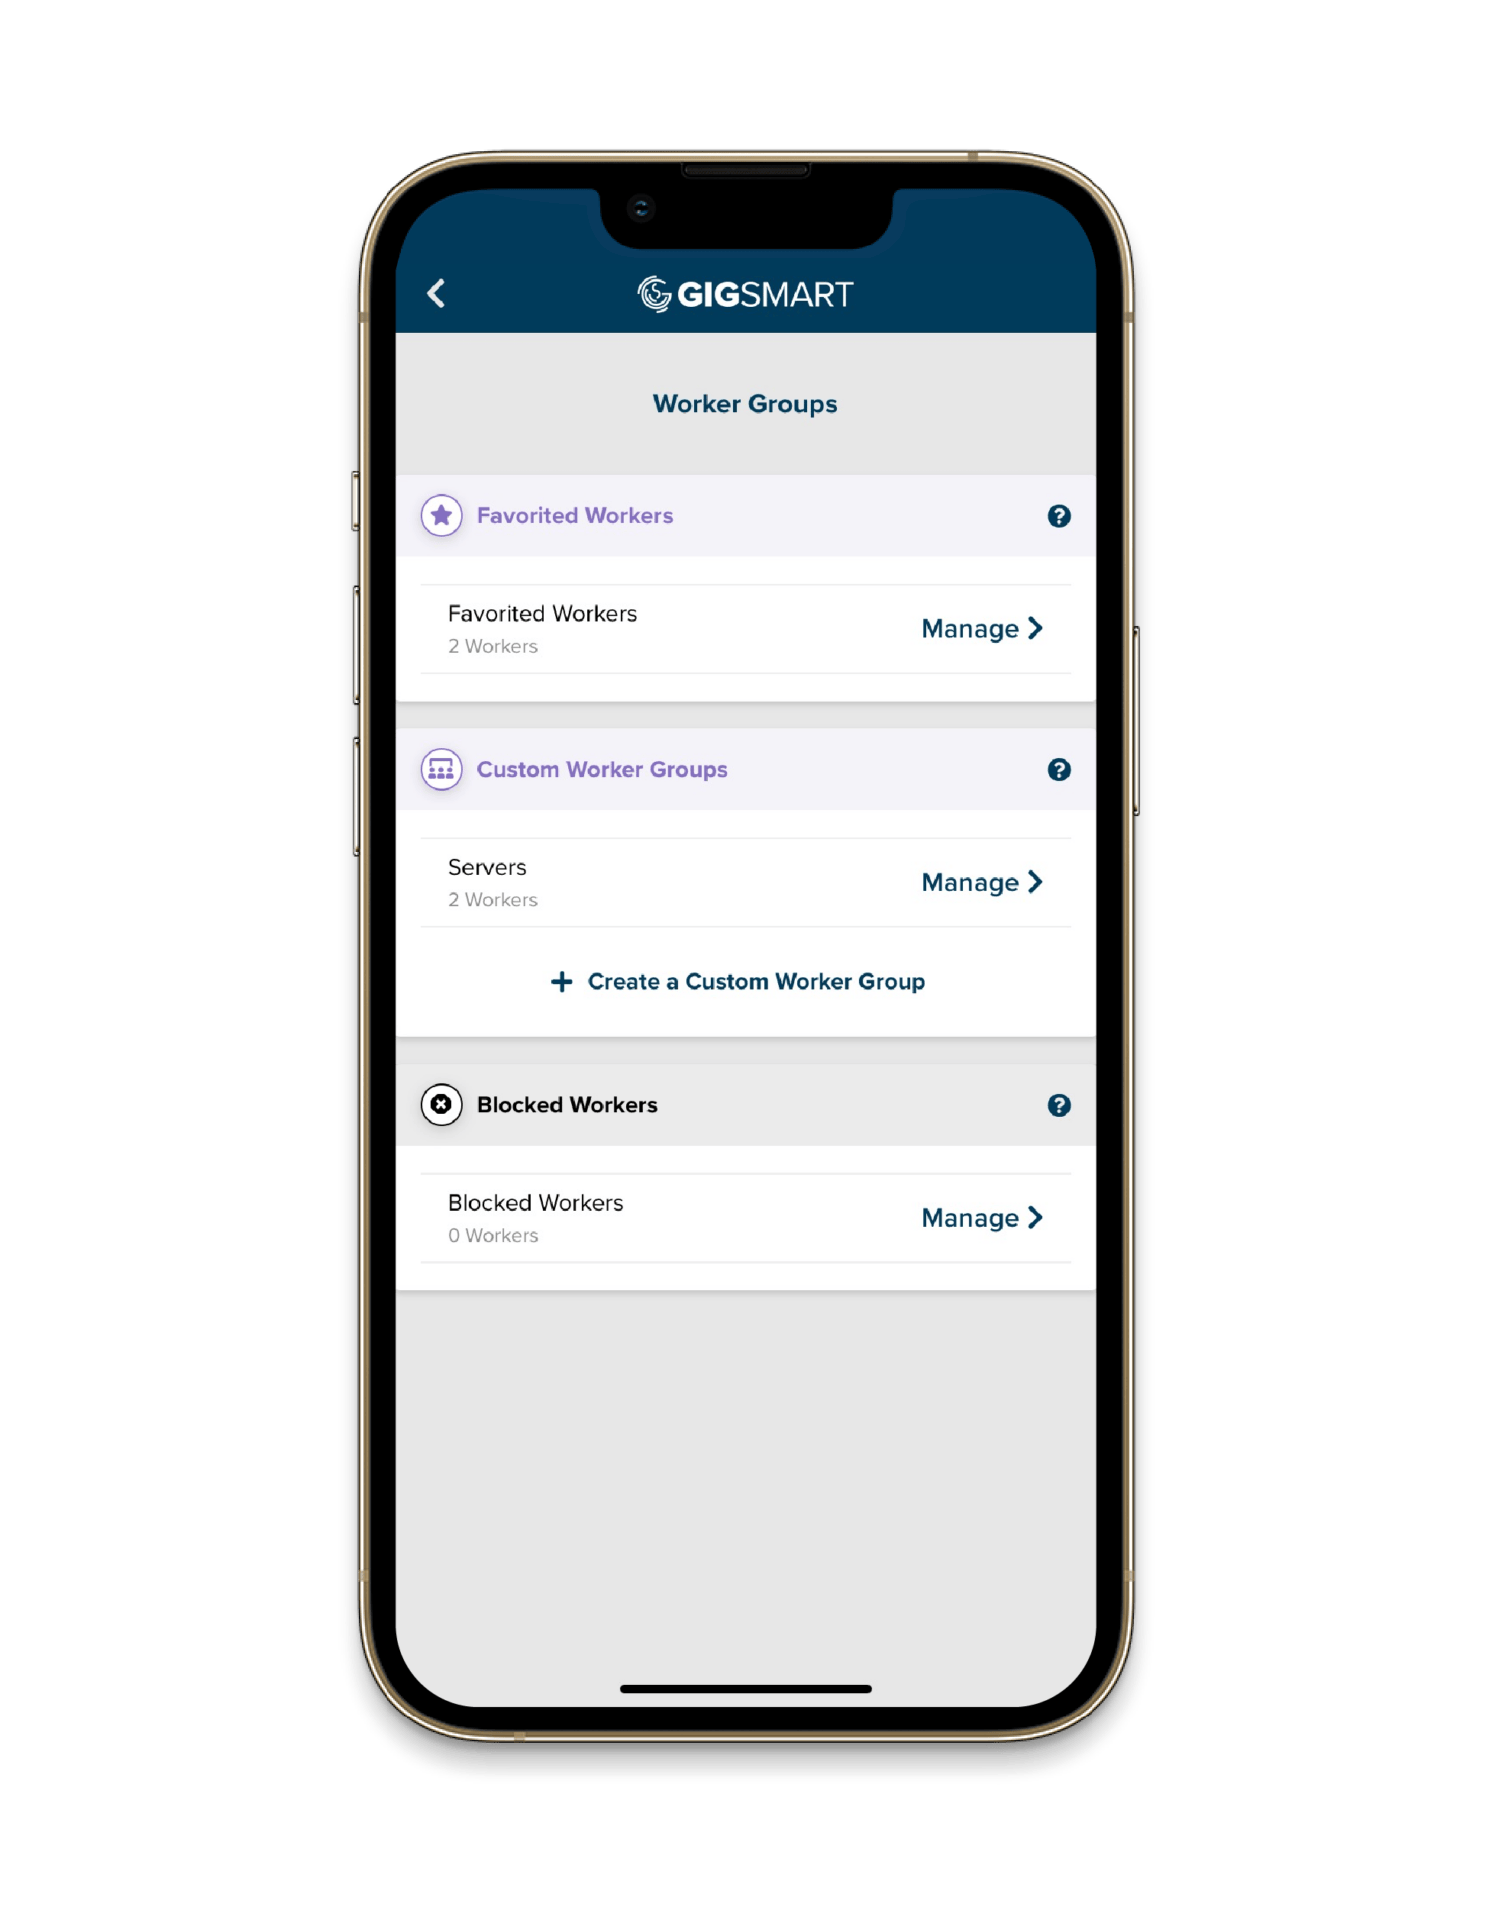
If you’re looking to make a list of your Favorited Workers, that Worker Group already exists by default.
If you’d like to go beyond favorites and build custom groups of workers for your hiring needs, you can do so by creating your own Worker Groups. We recommend setting them up for specific positions (delivery drivers, forklift operators, etc.), worker skills and expertise (TIPS certified, safety certified, etc.), based on their method of transportation (to easily accesses workers with a truck), or even their availability (can work weekends).
To set up your first Custom Worker Group, select “Create a Custom Worker Group” and follow the prompts to create your first Worker Group. You’ll choose a name for the Group, which is not shared with workers and will only be visible to you. After you named your group, you can start adding workers to it by searching for them by name or browsing through all the Shift Gig workers you’ve previously paid.
If you’re not quite ready to add workers yet, that’s okay, you can also do this from a few other places within Get Workers which we will review in Step Two below.
STEP TWO: Add Workers to Worker Groups
In order to favorite a worker or add them to your own Worker Group, you must have previously hired and paid the worker. You can build out your favorites list or your own Worker Groups from several different spots within your Get Workers account. The most common way to add workers to a Worker Group is by doing it the next time you finish a Shift.
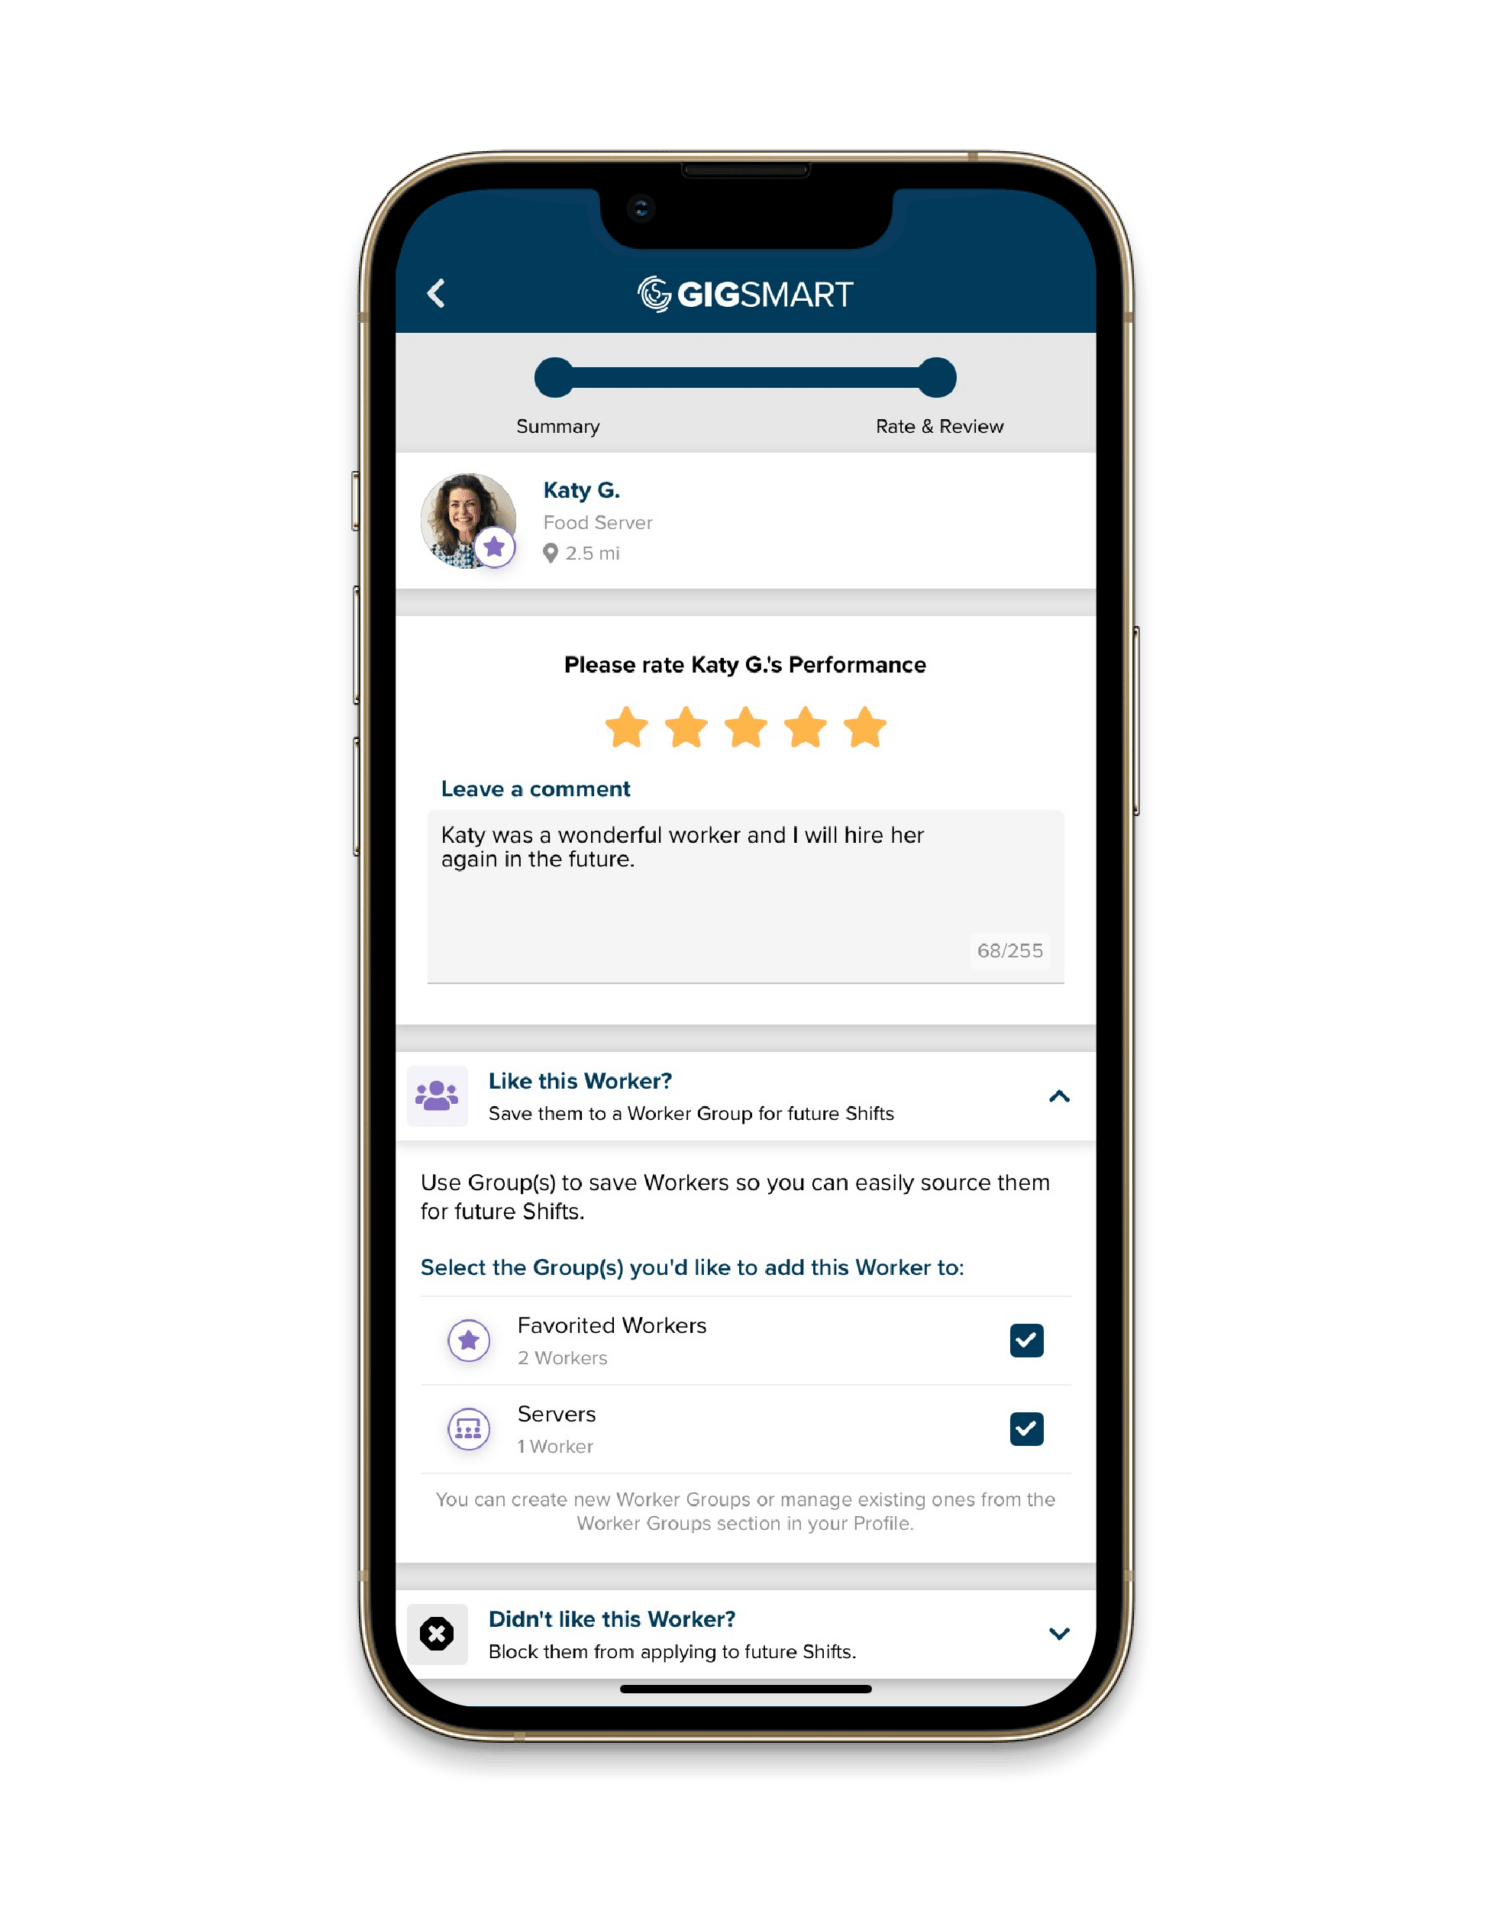
Once you approve the Worker’s Timesheet, you will be taken to the Rate & Review screen where you can rate the worker and leave them a review. In addition, you’ll be able to expand the “Like this Worker?” section to mark this worker as a favorite or add them to your own Worker Groups. To add them, check the box next to each Group you’d like to add them to. You can add the Worker to one Group or multiple Groups.
If you forget to add them at the end of a Shift, no problem. You can always add or remove workers from any of your Worker Groups by managing them from the Worker Groups section of your Profile within your Get Workers hiring account.
STEP THREE: Use Worker Groups To Make Hiring Hourly Workers Even Easier
Once you have built your Worker Groups and added Shift Gig workers to them, it’s time to use your Worker Groups to assist you in sourcing workers for your future Shifts.
The next time you need to post, you’ll be prompted to choose how you would like to source workers: GigSmart or using your Worker Groups.
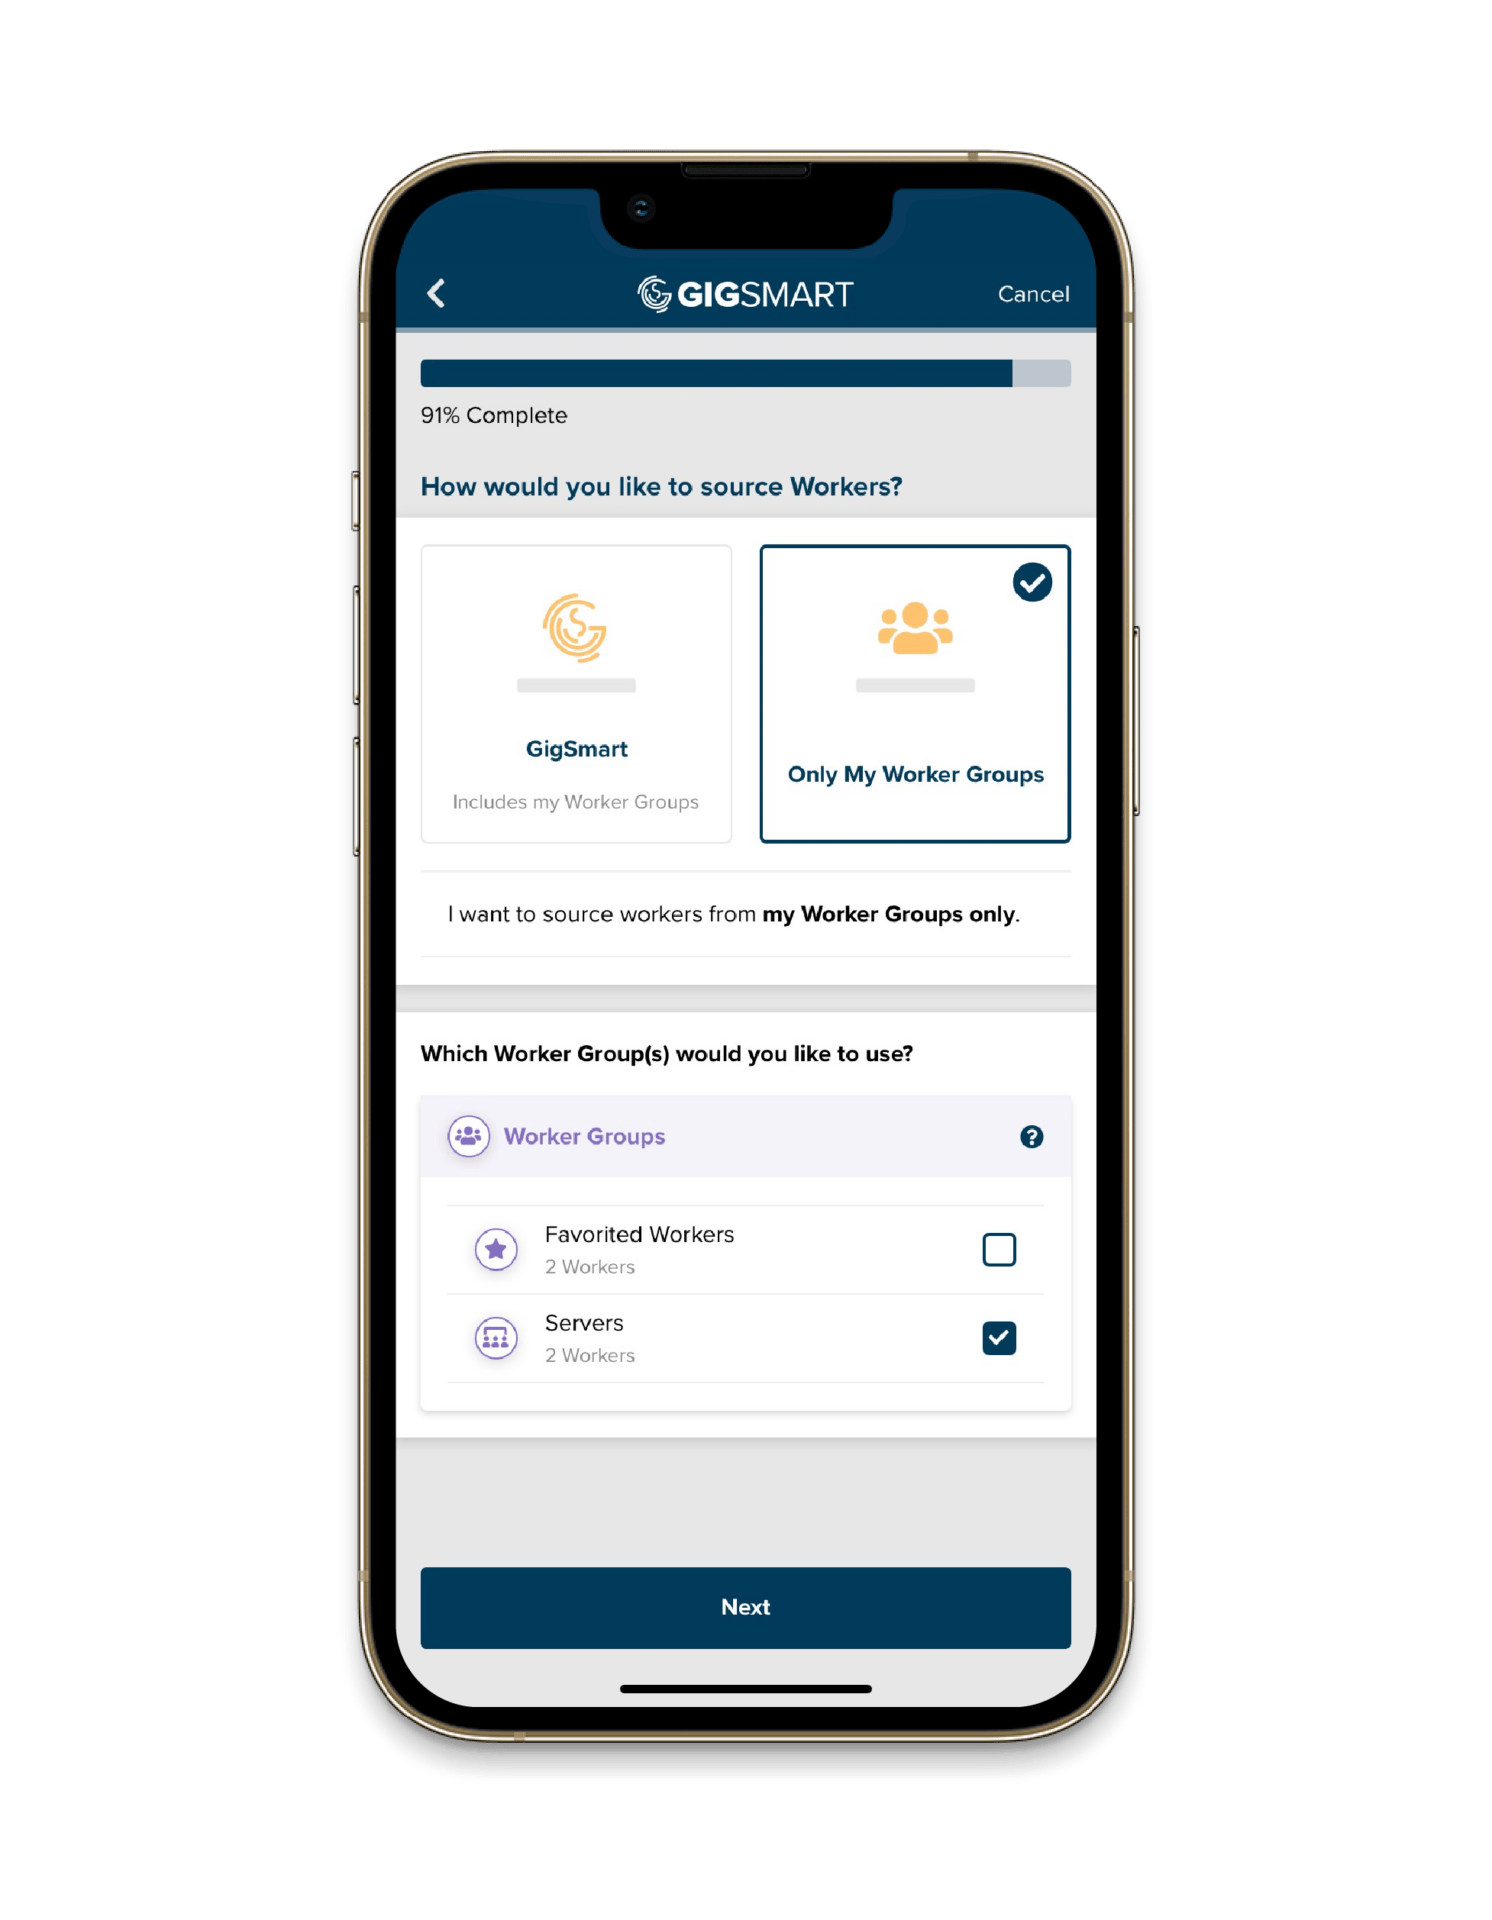
We recommend you start sourcing with your Custom Worker Groups first. Once a Worker Group, including the entire pool of GigSmart workers, is added to a Shift, it cannot be removed.
Choose one or more Worker Groups to source from and/or choose to open your Shift to all GigSmart workers. Once you’ve selected a sourcing method, you’ll continue on to confirm your payment method, review your Shift details, and publish your Shift.
Now that you know how and why you should be using Worker Groups to hire temporary workers in your Get Workers account, it’s time to start using them.
If you have additional questions about Worker Groups (or any other questions about Get Workers), head to our FAQs page to learn more.
With the addition of this feature, you’ll be well equipped to better source and manage your own pool of GigSmart workers, which should increase the show and fill rates on your Shift Gigs, resulting in a better user experience for yourself and the GigSmart workers you hire.
Should you need any additional assistance, you can always reach out to our friendly Staffing Support Team by contacting support@gigsmart.com.
So, what workers will you favorite and what Groups will you create first? Click here to open your Get Workers account to get started.